|
The body skin was remove from
the timber frame, this needed the bottom six inches replaced all
the way around from scuttle to the scuttle including the doors,
and re-skin the dickey seat lid and golf compartment door. At
this point we threw away the Yale household night latch on the
golf door and replaced it with the correct lock.
The firewall was replace with
a new hand made one, as the wood scuttle frame was broken at the
joints, the movement of the unsupported firewall had caused
large splits to develop. Heavy non original steel brackets had
been made to support it, these were discarded.
Much of the timber frame was
in poor condition, the scuttle was replaced, as were some of
the rails, one door frame and the dickey seat lid frame. |
|
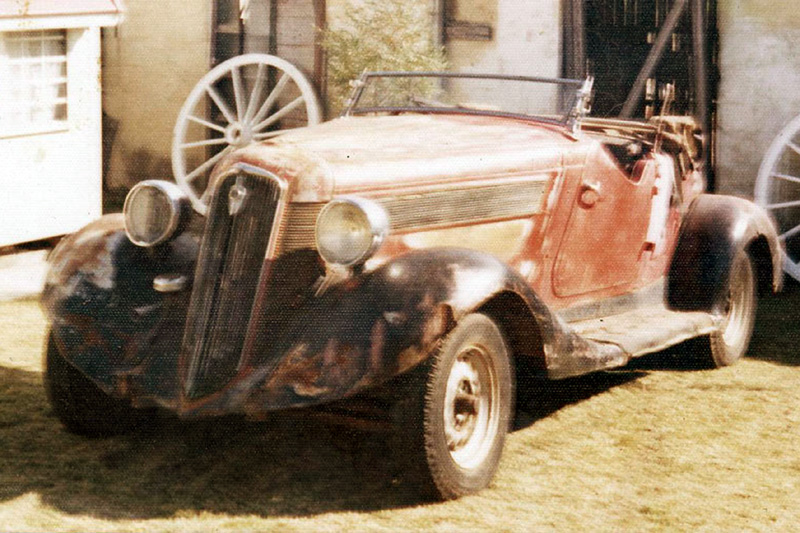
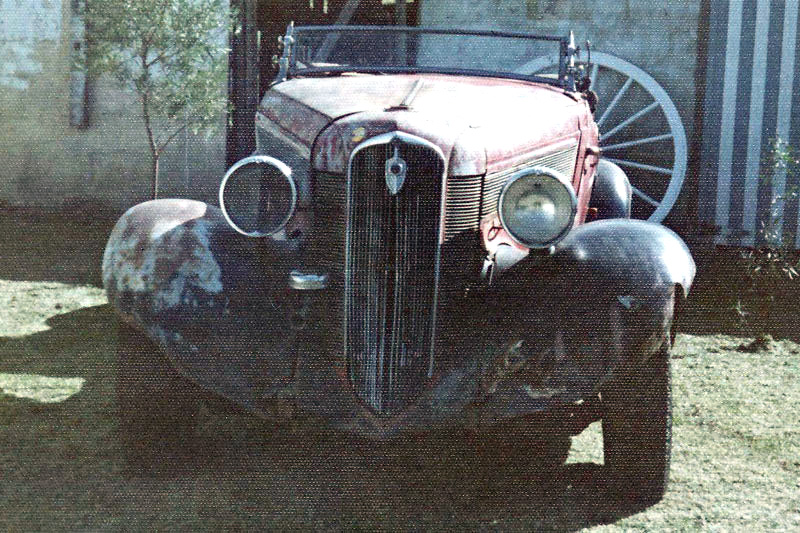
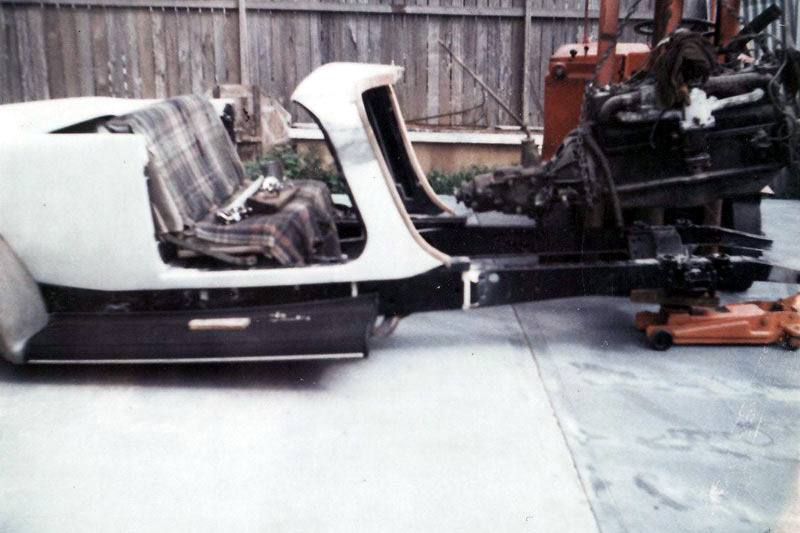
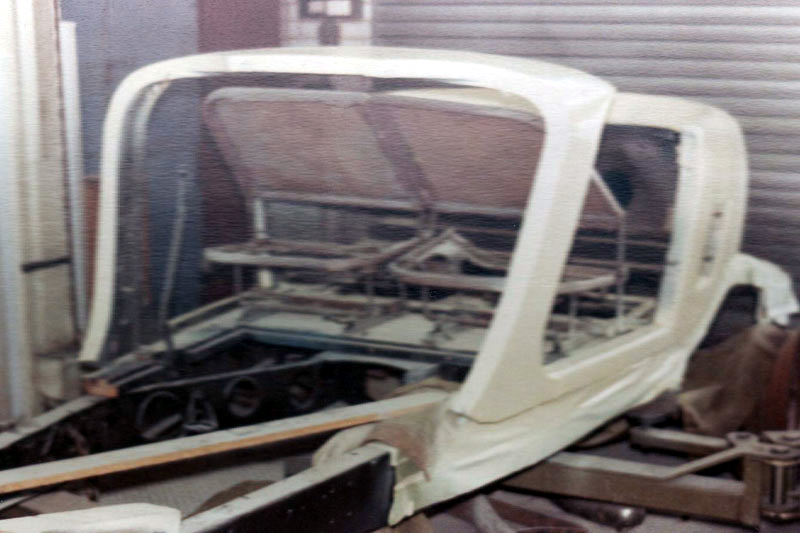
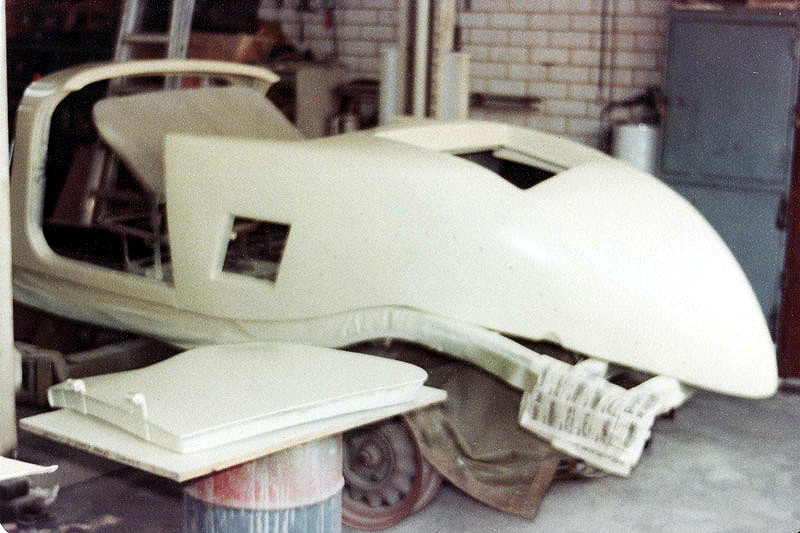
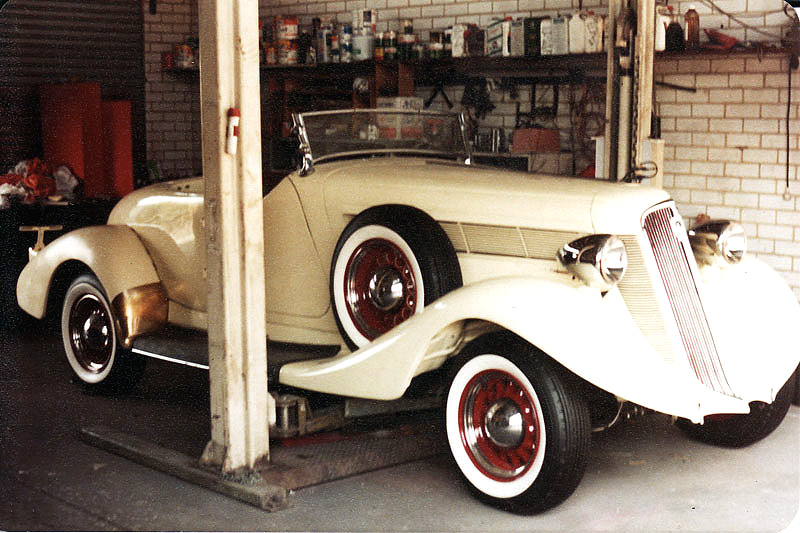
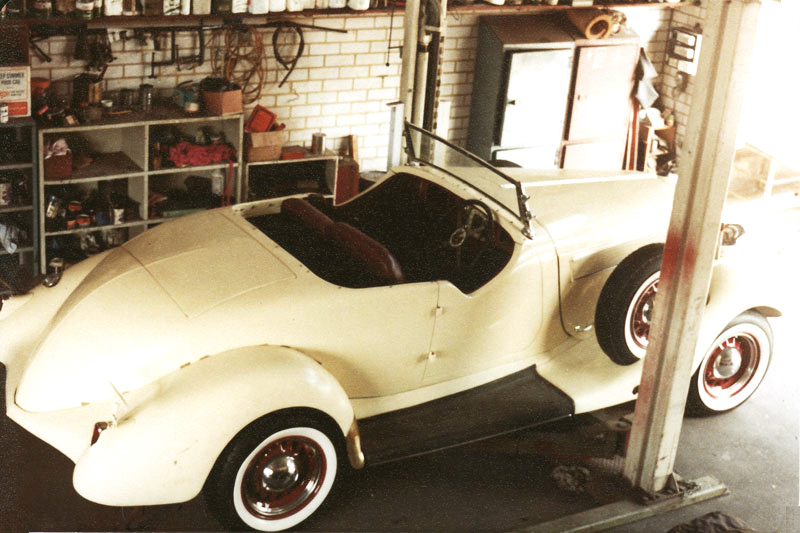
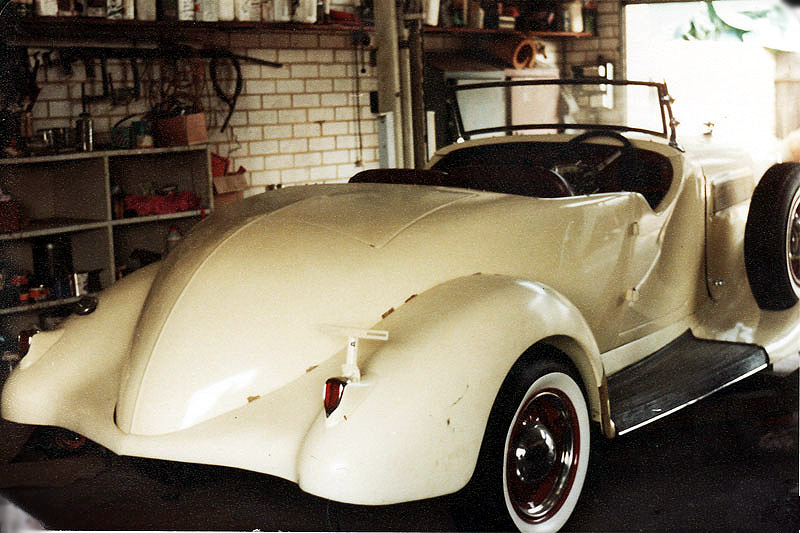
Above and below. This is
the car once I got it home and place the loose pieces on it for
the photo. |
 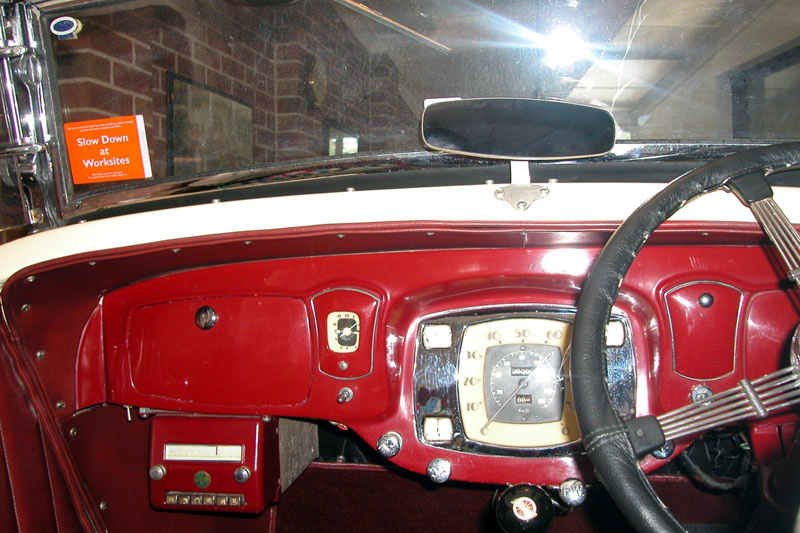
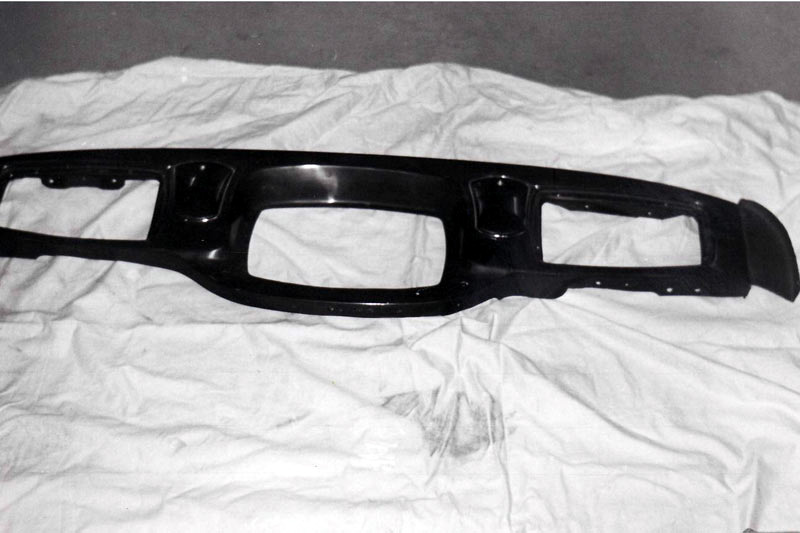
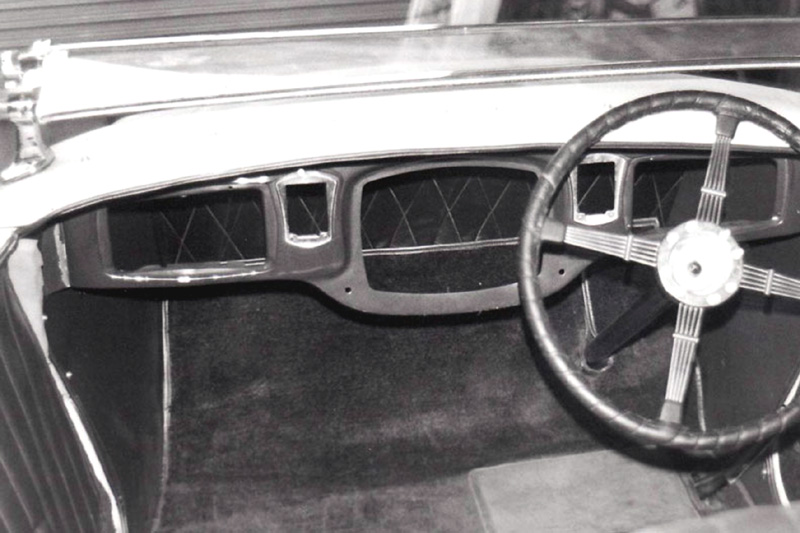
The dash panel before and after.

|
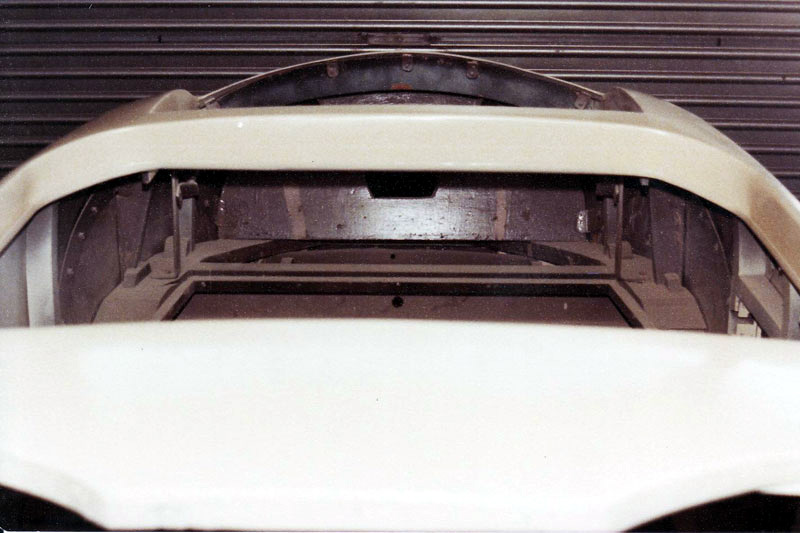
The steel skin removed to replace the rotted wood
and to repair the steel panels
|
|
The body
was put back on the chassis. As the front of the car was damaged, I
acquired from Needhams Motors a new front mudguard and a good
secondhand front mudguard, I was lucky enough to get a pair of
brand new old stock running boards, I also was able to get a good
secondhand radiator shell with side grilles, a new centre grille and
new die cast surround. I assembled all these parts plus the repaired
valances on the car to ensure the correct fit. the body then came
off the chassis, I had spent many hours cleaning it by hand with
degreaser, scrapers and hammer and chisel. At this stage I realised
that I was wasting my time, So I removed all the mechanical parts
from the chassis and sent it off to be sandblasted. The chassis was
in remarkably good condition, obviously protected by the build up of
oil and grease. Once back from the sandblasters I coated it with
generous amounts of primer and gloss enamel
I spent many hours stripping the
paint from the panels with paint remover and removing the rust with
rust remover and a wire brush.Next I primed all the panels filled
all the imperfections with spray putty, more primer and gave it
several coats of a 1930s cream acrylic lacquer.The dash panel had
had many of the holes enlarged and extra non original holes added
these all had to be filled and the original holes put back in the
original location. The drivers side glove box lid had to be remade
and the passenger side had a large rectangular no original hole
which was also filled up.
All the wheel rims were damaged, I
was able to acquire modern safety rims that fitted the centres and
had them fitted, They were painted in two pack enamel in maroon to
match the dash panel and fitted with 670x16 Dunlop road speed tyres,
which I painted white walls on, these were later changed for 700x16
Firestone wide white wall tyres, (the original tyre size is 650x16
with 700x16 optional equipment).
It was now time for the body to go
back on the chassis this time to stay. |
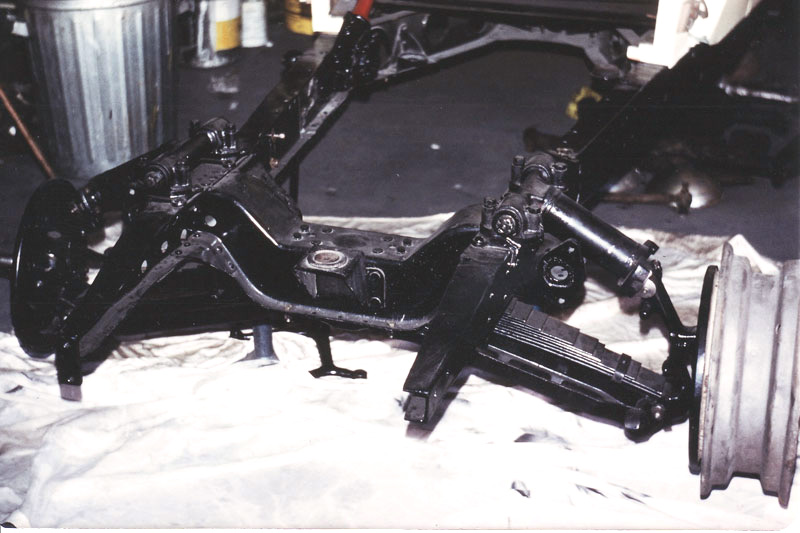
The chassis was sand blasted and given generous
coatings of enamel.
|
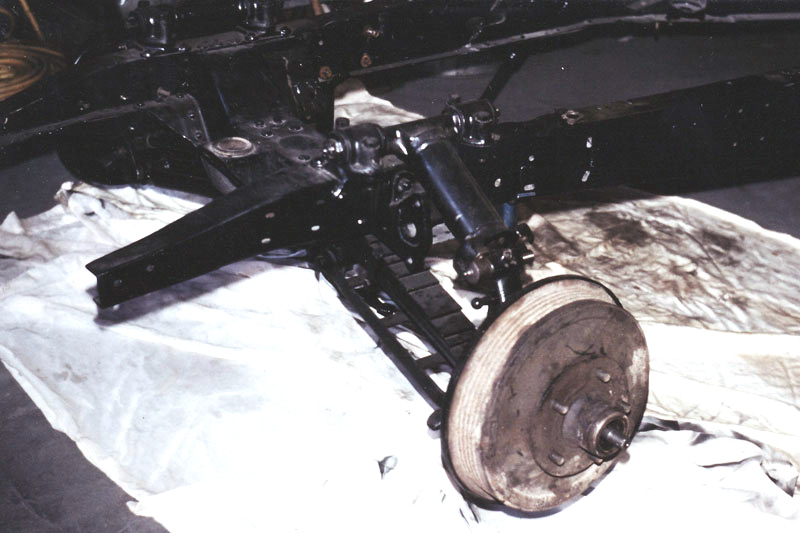
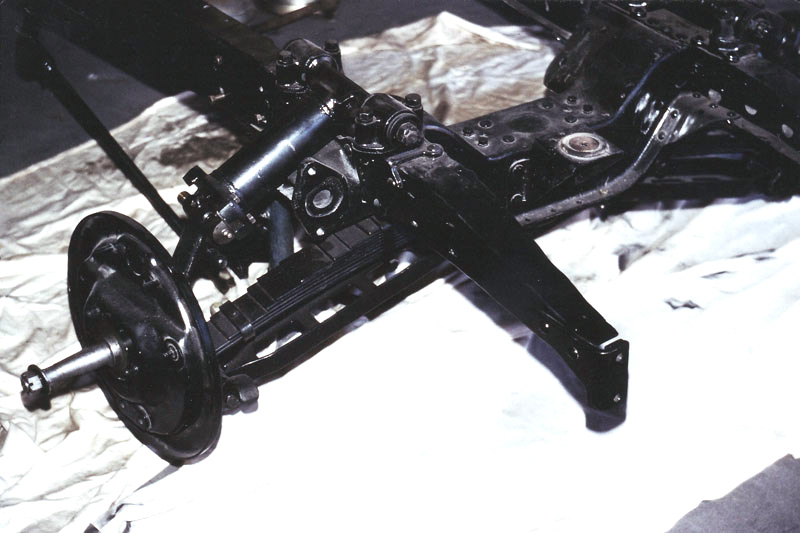
Above and below.
Studebakers independent Planar suspension received a new spring
and pins and bushes. |
|
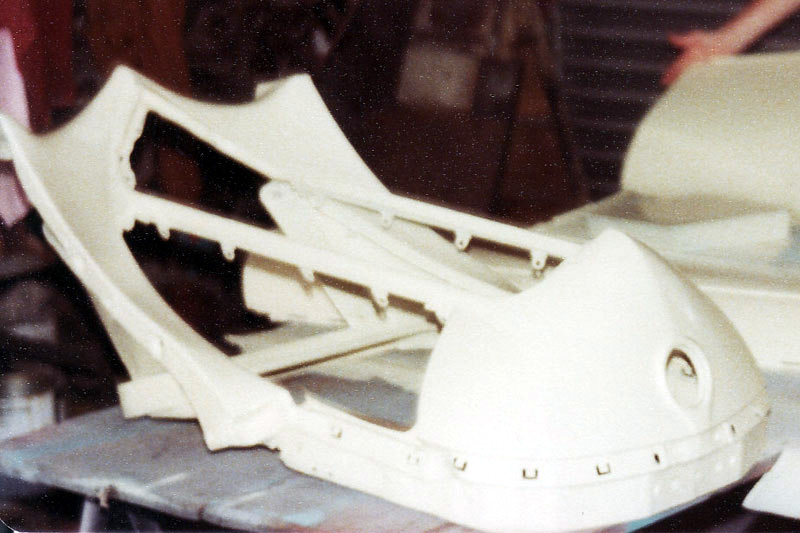
Above and below .The
steel skin repaired and replaced over the timber frame. |

|
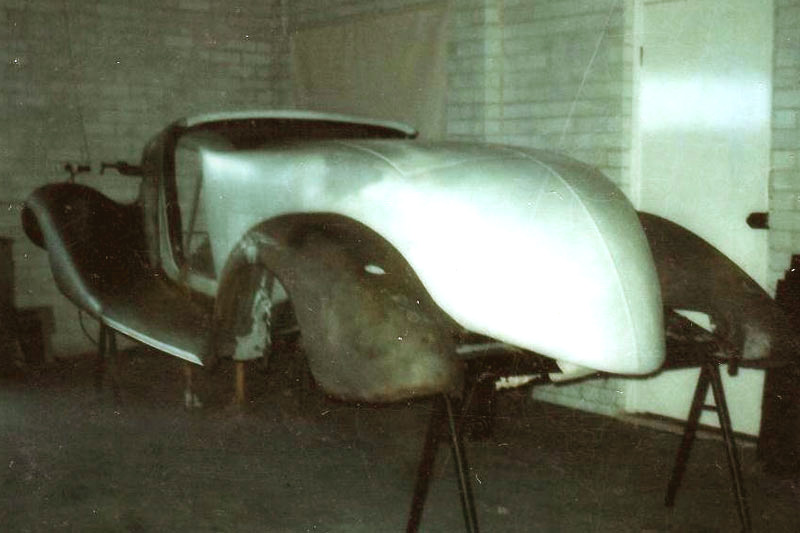
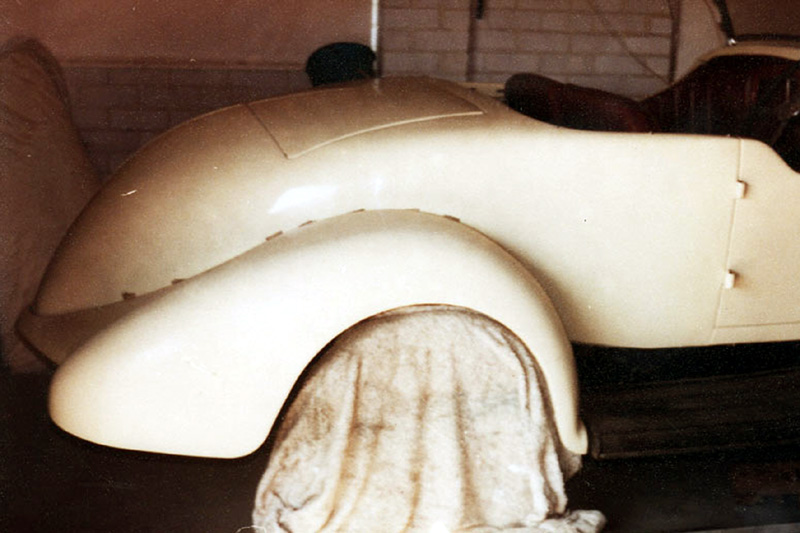
Above and below, The
body painted awaiting cutting back and polishing. |

|
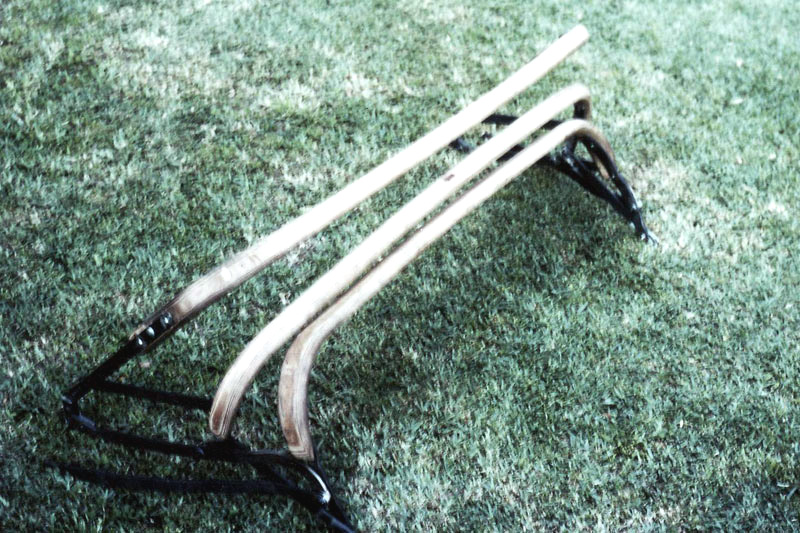
The hood irons and bows. The
problem was I didn't have any! The frame that came with the car
was in poor condition and incomplete and obviously off another
car. The answer was to make a new frame from scratch, I spent
many hours making new hood irons starting with a cardboard
pattern and then graduating to a working hardboard pattern and
eventually the final steel irons. I had them chrome plated, I
assembled the irons with stainless steel rivets. I had the bows
made, I then varnished and assembled them to the irons and then
onto the body.
I fitted the reconditioned rear
axle assembly to the car, (the rear semi elliptic springs were
later removed and reset with new main leaves). I fitted the
newly chromed plated windscreen and stanchions.
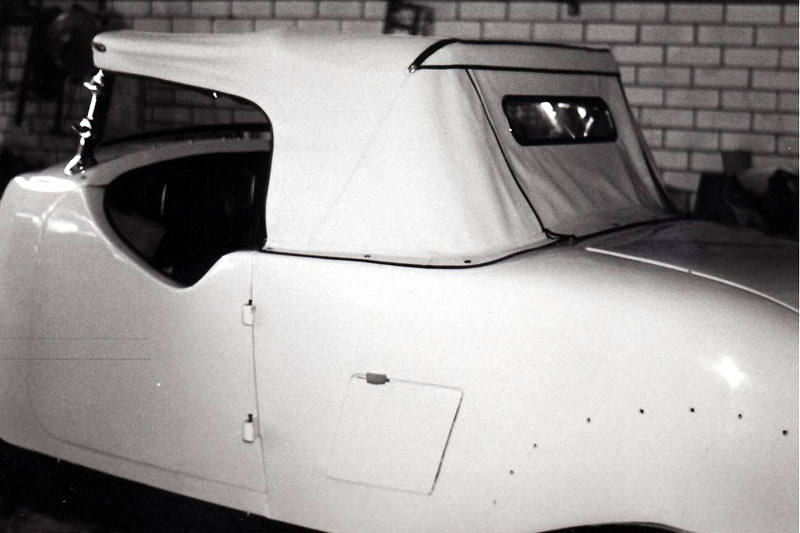
The body mounted on the
chassis was towed to the trimmers where it received new maroon
vinyl upholstery, maroon carpet and a white vinyl hood and
tonneau cover in the material usually used on boats, but in the
1980s that was all that was available. In 2007 the hood was
getting a little tatty as was the paint on the car, many
adjustments and minor repairs were made, the hood material was
replaced with an off white canvas and the vinyl maroon
upholstery was replaced with maroon leather. |
|
On the way to the motor
trimmers to be upholstered. |
|
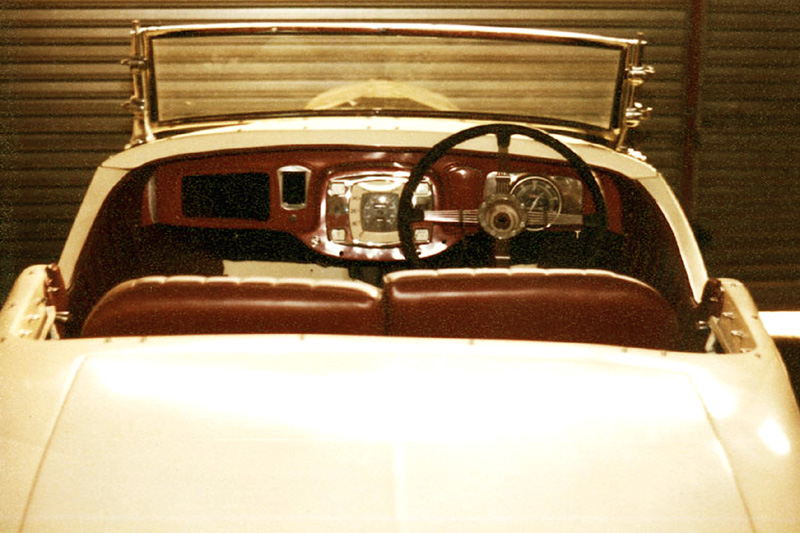
Above and below. Back
from the motor trimmers. |
|
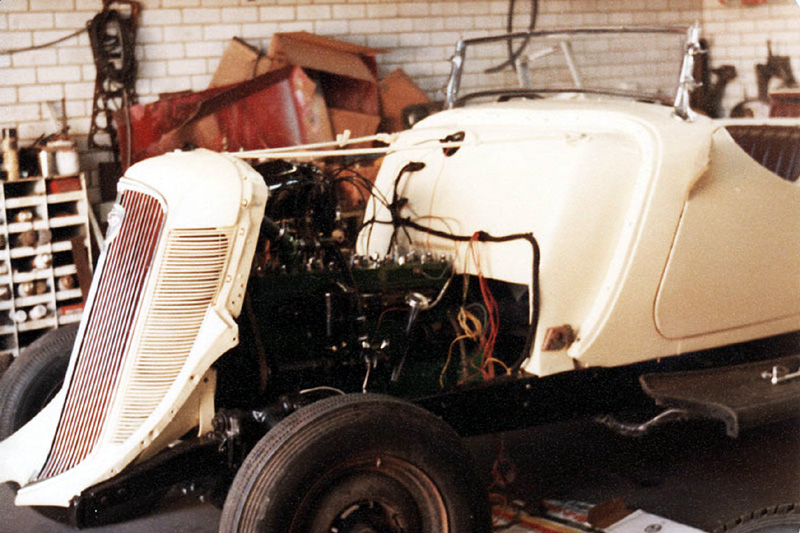
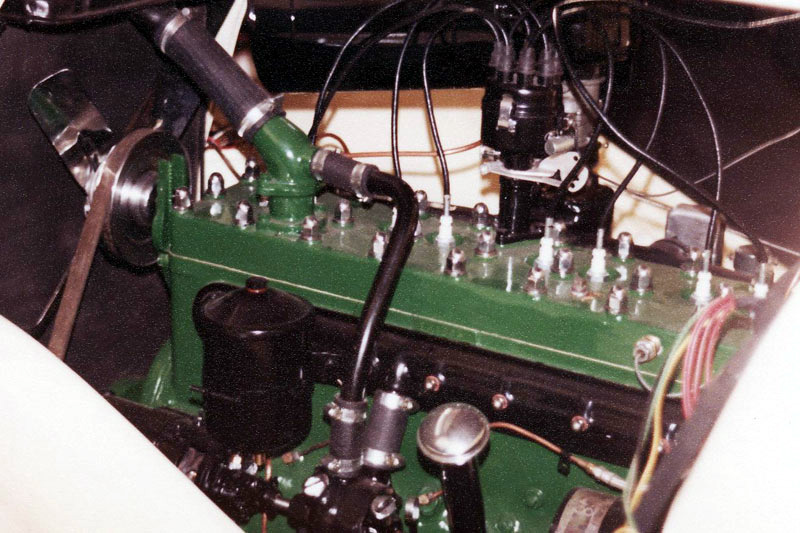
Above and below. The fully
reconditioned engine fitted in the car |
| |
|
Whilst the car was at the motor
trimmers to the engine was sent out, to be machined, this included
boring to 60 thou oversize, (I believe this to be it’s second rebore),
crankshaft grind, new pistons, gudgeon pins, rings, big end, main
and cam shaft bearings, new valves. All moving parts were balanced
including the flywheel. As it turned out the original Studebaker
parts did not need attention as they were already balanced, courtesy
of the Studebaker factory at South bend Indiana in 1935. The oil
pump water pump,12V generator and the starter motor were
reconditioned. Eighty hours was spent assembling the engine
cleaning the oil galleries plasti gauging the bearings, matching the
manifolds and ports and another forty hours preparing and painting
the engine with a heat resistant primer and gloss green enamel.
The body came back from the
trimmers and I started on the steering and front suspension. I was
surprise of the quality of the steering and independent front
suspension. The Ross steering box is the same as used on the J model
Duisenberg! It is the worm and pin type the pin running on a double
row Timken bearing. with tie rods to each wheel, The front
suspension is Studebaker’s Planer type, which consist of a massive
transverse spring, which (I acquire a brand new spring from
Needham’s) and upper and lower control arms, The upper outer knuckle
supports are in needle roller bearings, the inner upper pivots are
very large rubber bushes, the lower inner pivots are rubber bushes
and the lower outer pivots are a threaded pin, I was able to buy all
these parts new. The rear suspension bushes are the split rubber
type the same as used on a modern leaf spring vehicle
The instruments were checked and
repaired where necessary and fitted to the car.
The engine was lifted into the
chassis, fitted new engine mountings, and fitted the accessories,
starter generator, water pump etc, fitted and connected the new 2
inch exhaust, with tandem mufflers. fitted the radiator grilles and
radiator to the shell and fitted the whole assembly to the car and
connected the radiator hoses to the engine.
By now I was getting anxious to
start the engine, I ran a temporary fuel line from a bottle and
connected a battery. A few quick turns of the starter and the engine
burst into life for the first time in eight years. |
|
Above and below. The
final assembly, as panel by panel is fitted. |

|
I made a new wiring harness
with Australian made electrical cable, including provision for
flasher lights, fog, and driving lights.
The mudguards were fitted, the
bonnet top and then the bonnet sides.
Then the headlights and tail
lights were fitted and connected.
The reconditioned clutch,
gearbox, reconditioned diff centre and axles including all new
bearings, tail shaft, new universal joints were fitted
The next six months were spent
fitting the bumper bars, making and connecting linkages and all
those five and ten minute jobs that I can assure you take a lot
longer.
The brakes were totally
overhauled, this included machining the 121/8” composite steel
and cast iron brake drums, lining the brakes with MZ5 woven
linings, lining the master and wheel cylinders with stainless
steel sleeves, making all new rigid brake lines and fitting new
flexible hoses and filling the system with silicon brake fluid.
At last the car was ready to
register.
The restoration took fourteen
years, funny how things take so much longer than you imagine! |

|
The car now almost
complete. |
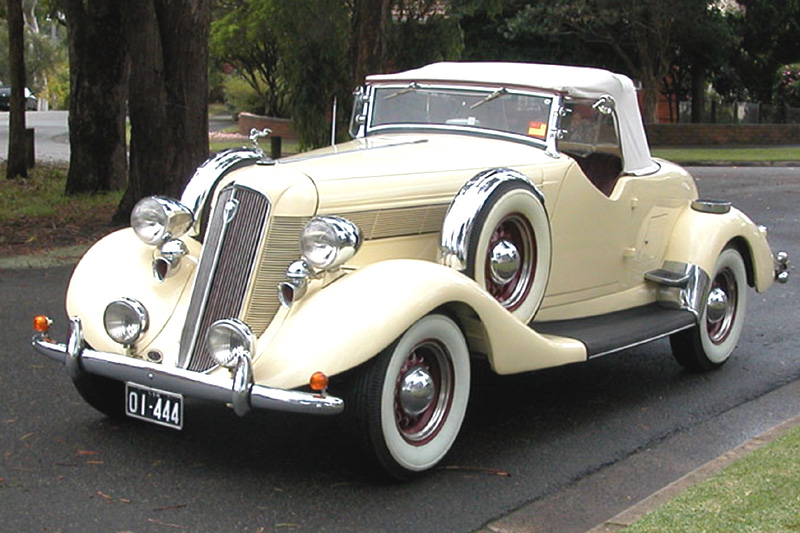
This is the
car in 2011.
In 2007, after
22 years on the road and traveling all over NSW as far as the Queensland
border, it
receive a new
hood (top) new leather upholstery, new paint, new 700x16 Firestone wide
white wall tyres. |
